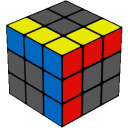
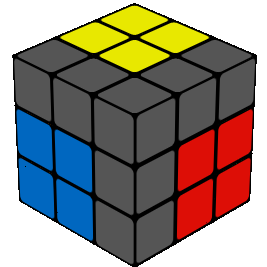
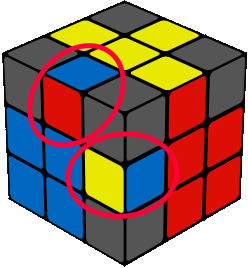
Home

'Workbench' Overview

How the 'Workbench' works

cubeiteasy.com  for a hands-on experience with a configurable solver


Before we move on... (2 basic concepts.)


Placing a cubie can affect other cubies, sometimes in unexpected ways. If we can manipulate cubies while containing side effects within a controlled area (the workbench), everything becomes much easier.

In simpler terms, by bringing both the desired cubie and its destination inside the 'workbench', we can swap the two cubies. Then, after moving the cubie to its final destination, we achieve both these objectives:

This concept forms the core idea behind the 'Workbench' method.


The method

The 'Workbench' method comprises three main steps:

1) Placing cubies in the 'workbench'

example: To bring the cubie from the current position: to its final correct position: .


  Buttons Click these 3 buttons
a) Brings the destination cubie from mub into the 'workbench' at position muf
b) The Sledgehammer that moves the cubie YG from rus to muf
c) undo the first rotation and brings the cubie YG to its final position: mub


a) Brings the destination cubie from lub into the 'workbench' at position rub
b) The Sledgehammer that moves the cubie OYG from rdf to rub
c) undo the first rotation and brings the cubie OYG to its final position: lub


Corners and edges share the same pattern, but they involve different cubies:


2) The 'Trap'

Step '1' terminates when, on the yellow face, OY and YG are correctly placed.


At that point there can be 2 possible main outcomes.

There is a more elegant approach without the 'Sledgehammer'


3) The final corners

Now it is time to positioning the remaining Corners. The problem is they are inside the workbench, that means: any action on any of them has side effects on the others!

This isn't a straightforward manipulation, and despite my extensive experience, it still makes me feel like someone is cutting the branch they're sitting on. But there is a solution I learned from the web that makes thinks astonishing simple.

The key of this step is the change in perspective, changing the workbench from the original to the NEW workbench.

Look at the page: '3 out of 5'


Working with the new workbench, will put in place the cubes on the yellow face and put the others, (inside the new workbench) out of place. Don't worry about that. This time the Rubik's cube will be much more friendly and when the last 2 corners are put in place, the Rubik's cube itself will put everything back in the right place.

Sometime, the last 2 corner are in place but not correctly oriented. In this case, it is better changing again the workbench from the NEW to the Last one workbench.